• Skip to primary navigation
  • Skip to main content
  • Skip to primary sidebar
  • Skip to footer
phone(866) 826-2993
Login / Register
search
shopping_cart

North Slope Chillers

Industrial Water Chiller Systems

  • Home
  • Solutions
        • Chillers
          • Freeze (40 to 75F)
          • Deep Freeze (10 to 45F)
          • Custom
          • Smart Chillers
        • Accessories
          • Fluxwrap
          • Icewraps
          • Keg Coolers
          • Tank Cooling
        • Misc
          • Air Handlers
  • Applications
        • Biotech
        • Cannabis
        • Chemicals
        • Dairy
        • Deionized Chillers
        • EDM
        • Fermentation
        • Food
        • Glycol Heaters
        • Hydroponics
        • Lasers
        • Plastics
        • Printing
        • Rental Chillers
        • Server Cooling
        • Welding
  • Learn
        • Resources
          • Register Warranty
          • Chiller Sizing Calculator
          • Chiller Terms
          • FAQ
          • Glycol Concentrations
          • Seasonal Maintenance Tips
          • Fulfillment Policy
        • About Us
  • Blog
  • Shop
  • Cart
  • Login / Register

Blog

The Rise of Craft and Microbreweries

Adam Jacobs · Apr 10, 2019 ·

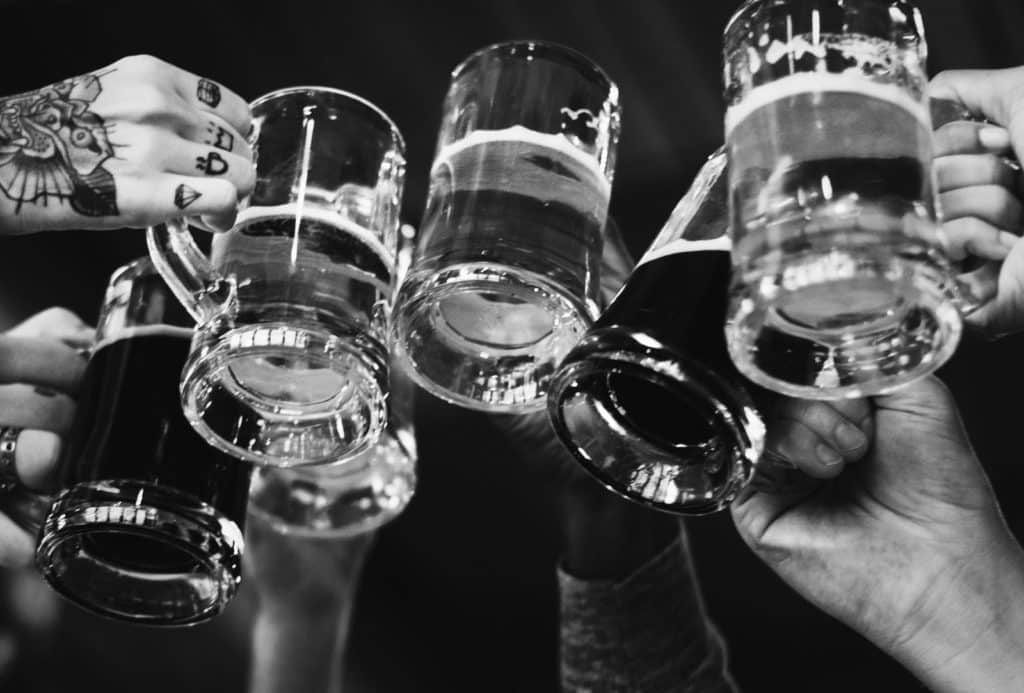
Visit any large city in the United States today, and you’ll discover an ever-increasing amount of craft and microbreweries. Microbreweries and craft breweries are similar in almost every way, with a few exceptions.

download our catalog

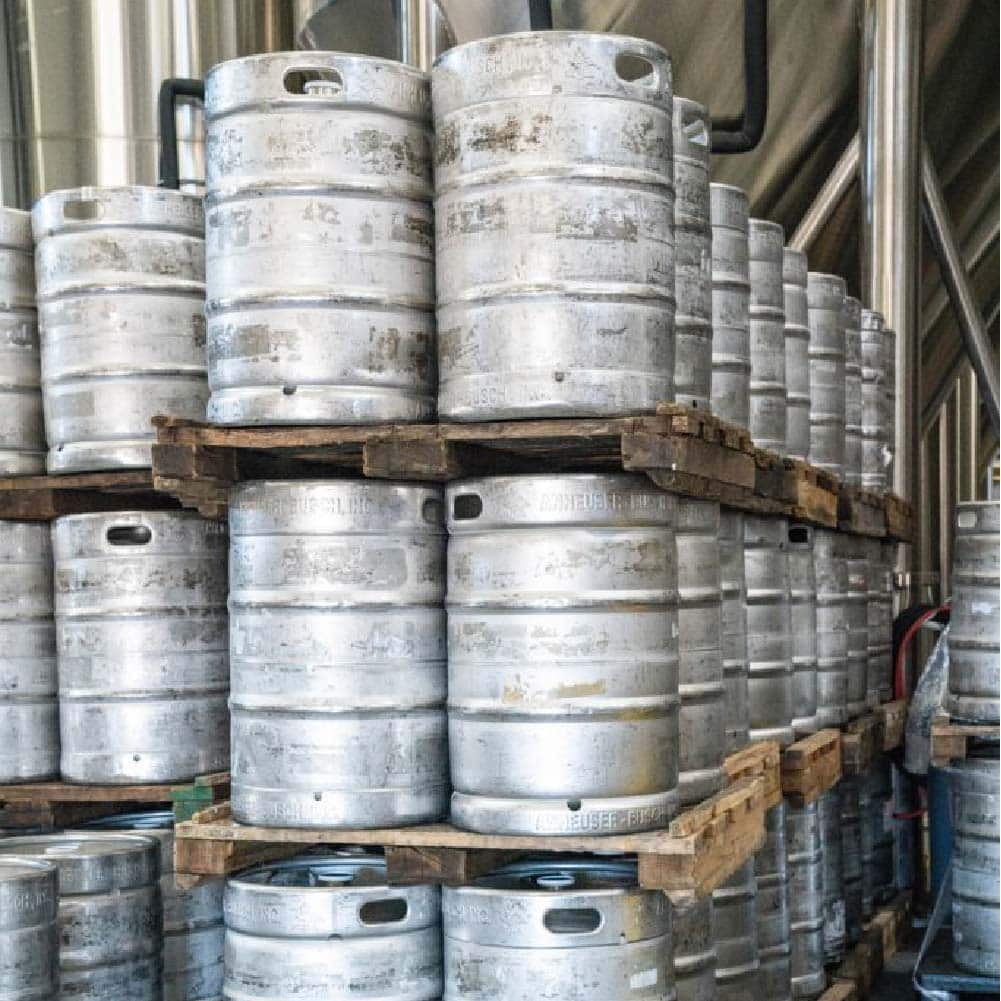
The American Brewers Association says microbreweries are allowed to make only 15,000 barrels of beer (460,000 gallons) per year and must sell 75 percent of its inventory outside of its brewery location. Craft breweries can’t produce more than 2 million gallons of beer per year. In addition, craft beers must be made with 50 percent malt and are independently owned.

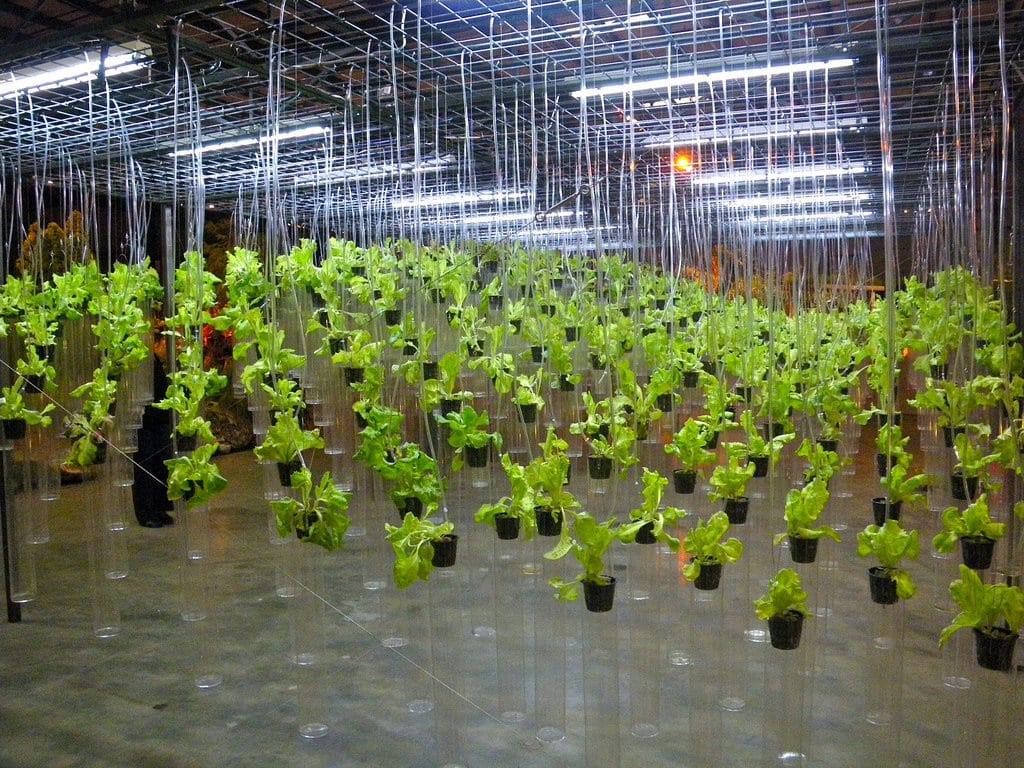
It’s easy to mix the two up. One thing they do have in common is that many craft and microbreweries begin with people creating new beer concoctions in their own homes, known as homebrewing.

Homemade beer was, at one point, more American than baseball. When they were not establishing new countries and fighting oppressive powers, George Washington, Thomas Jefferson and James Madison were home brewers.

George Washington Beer
George Washington’s homemade beer recipe, written in his journal.

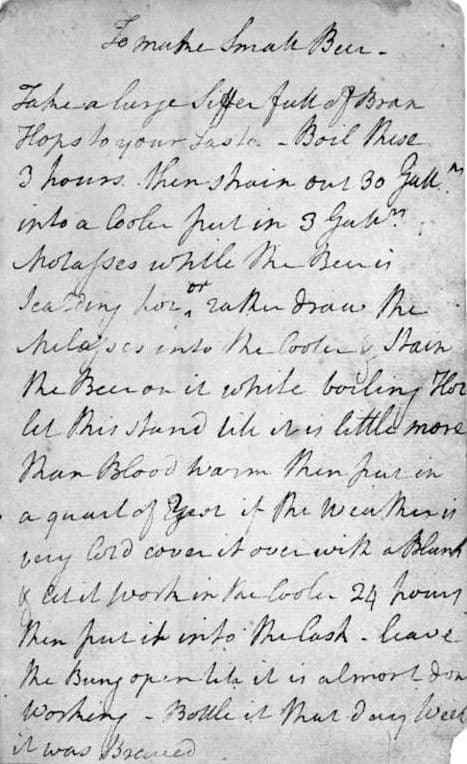
At that time, beer was consumed more than water. According to the American Homebrewers Association, “Beer has long been a beverage brewed as a source of potable water in areas with disease- and famine-stricken resources, as was the case in some instances in America.”

Revolutionary War-era brews were not flavorful, nor did they provide a “buzz”. These early American beers were often referred to as “soft” or “weak” due to their low alcohol content, but were popular enough that they led to the creation of craft and microbreweries, which populated many American cities until Prohibition began in 1920.

They virtually disappeared until the 1980s, when craft and microbreweries began making a comeback. During that decade, a new community of craft brewers started expanding out of their garage homebrewing hobby into commercial opportunities, giving Americans back the tradition of flavored ales and lagers. It was a revolution in its own right. 

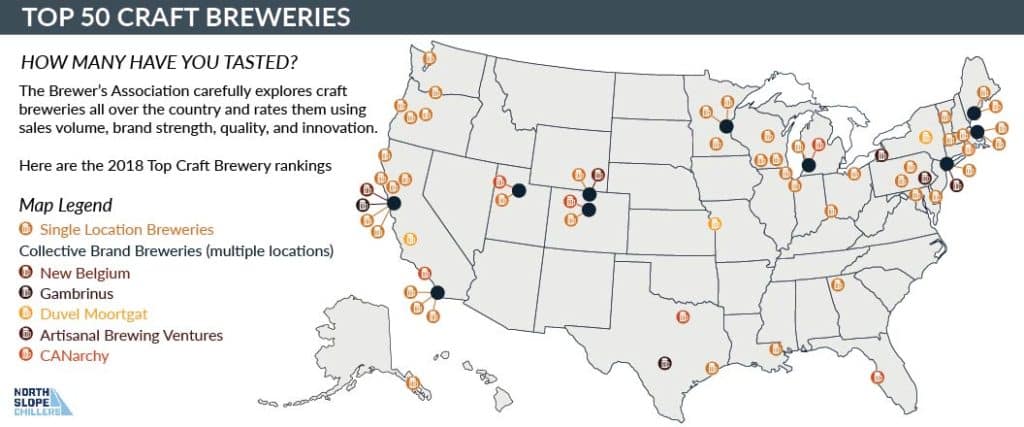
Since then, craft brewing has exploded into its own industry in the United States, with California, Colorado, Washington and Oregon boasting the most craft breweries. Compared to just eight craft brewers in 1980, there were more than 6,000 in 2018. Frankenmuth Brewery, a craft brewery based in Michigan and the oldest operating craft brewery in America, claims most Americans live no farther than 10 miles from a craft brewery. The culture of small, independent breweries has become something that drinkers can connect to, and participate in. 

Craft and microbrews today are rich in flavor and are considered an art. These artisan brews contrast greatly  with what some beer critics call “buzz beers,” such as Budweiser or Miller Light, which people drink more for the buzz they get instead of deep flavor. Whether you prefer sour ales or a rich lager or a stout IPA, there’s something for all beer drinkers so long as craft and microbreweries continue to thrive. 


Craft Brews: What Determines Alcohol Content?

Adam Jacobs · Apr 4, 2019 ·

How much alcohol is in the last beer you drank? Do you know how to determine the amount of alcohol, and why it’s in your brew? Read on to find out.

Craft brewing is an incredibly diverse industry. Brewers have a touch of artistry at how they craft their beers, with fermentation times, yeasts and temperatures varying to get the precise flavor desired. All of these things have an impact on alcohol content, which is one of the most important aspects of craft brewing.

Glass of beer on a wooden bar

Alcohol content in beer begins with a specific key ingredient: fermenting yeast. Rachel Bell, Director of Operations for Kiitos Brewing says the process of creating alcohol in beer was discovered thousands of years ago.

“Alcohol only really exists because of fermentation,” she said. Fermenting yeast extracts sugars from grains, creating alcohol. The type of yeast and method of fermentation will result in varying alcohol levels.

“If you leave some sweet liquid outside long enough, wild microorganisms will find it and you’ll see it start to bubble slightly,” Bell said. “Some beers are even made this way via ‘wild fermentation.’”

Juilia Herz, a writer for craftbeer.com, says wild fermentation is a result of spontaneous fermentation, “an age-old practice, first by accident and then by intention, that truly puts Mother Nature at the helm of brewing magic. This type of fermentation takes place when ales are fermented with wild yeasts—from an open window, for instance, or already residing in a barrel—rather than cultivated ones”

Any kind of fermentation using the right yeast will result in alcohol.

“This yeast has been carefully bred and developed into a huge variety of strains over thousands of years, and much larger amounts are added to commercial beers than one would find wild in nature,” Bell said. “Otherwise it would be impossible to get consistent flavor or amount of alcohol.”

Saccharomyces cerevisiae, a specific species of yeast that has been in use by brewers for thousands of years.

Temperature is critical to yeast fermentation. Different yeasts will result in different temperatures needed to achieve ideal alcohol content. Thus the key to controlling alcohol content is dialing in your process cooling and knowing your yeasts. Bell explained that most yeasts “are typically more active in slightly warmer temperatures, but not always. Lager yeasts (which are a different species) prefer very cold temperatures, but they take much longer to finish the fermentation chilling process.”

But not all yeasts need to be cooled down, Bell says.

“Different temperatures can also impact what flavorful by products the yeast will give off. Esters, which are a different type of alcohol, give the beer an additional fruity flavor and are typically activated at higher fermentation temperatures.”

If you want total control over alcohol levels in your beer, you’ll need to master your yeast and the temperature it best ferments at.

Lager vs. Ale

Emma Pollock · Apr 2, 2019 ·

Around the world there are various styles of brilliantly crafted beers. From popular crisp lagers to heavy roasted stout there is a beer for just about everyone.

download our craft brewer’s business guide

Beer is comprised of four main ingredients: water, yeast, malt and hops. It seems so simple!

So, how do breweries create such unique flavors? The answer is in the fermentation process, specifically the temperature. Monitoring temperature and responding appropriately to shifts throughout the brew cycle make or break delicious and unique craft beers.

When it comes to beer, there are two main categories – ales and lagers.

Lager

Process cooling plays an essential part in brewing both ale and lager. Lagers have a lower fermentation temperature. Lagers are brewed with bottom fermenting yeast. Bottom fermenting yeast strains work effectively at lower temperatures typically around 41°F–50°F.  The lower temperature causes the yeast to work less vigorously and create carbon dioxide more slowly. This process allows for hop flavors to slip in, leaving lagers with the common “crisp” finish. Another unique characteristic about lager brewing is it is finished with a chilled storage.. To make the perfect lager, it is crucial for breweries to store lagers at the perfect chilled temperature.

Pale lager is the most widely consumed and commercially available type of beer. However, lagers can be pale, amber, or dark colored. The only factor that makes a lager, a lager, is the fermentation process.

Popular lager brands are: Miller, Stella Artois, Bud Light, Corona, and Heineken.

cheers pints of beer
pexels.com

Ale

Ales are all about the hops! And, Ales cover a very wide spectrum. Ales have a higher fermentation temperature and are brewed with ale yeast. Typically top fermenting yeasts work best in the general range of 60°F–78°F. This warmer temperature allows sweet, full bodied, and fruity flavors to be infused in ales. The peppery finish of a French saison, or the fruity esters of German wheat beers are results of finding the perfect fermentation chilling methods to control temperature.

There are many varieties of ales including bitters, milds, abbey ales, pale ales and IPAs. Although these unique ales have very distinct characteristics, they are all typically fuller-bodied with nuances of fruit and spice as well as a pleasantly hoppy finish.

Ales are often thought of as darker than lagers ranging from rich gold colors to reddish amber tones, but they can also have lighter colors. The fermenting process at higher temperatures gives these beers very distinct fruity tones, acidity and pleasantly bitter seasoning. Along with these flavors, ales can also be brewed with rich coffee and chocolate flavors. To put it in simple words, ales are more assertive than lagers.

Popular ale brands are: Guiness and Blue Moon

variety of beer bottles
pexels.com

Easy Temperature Control

Whether you’re looking for a light, crisp lager, or a flavorful stout, there is a beer out there for you! Hundreds of home breweries are popping up all across the country thanks to new technology that makes home brewing easier than ever. North Slope Chillers take the hard work out of temperature control; no matter what type of brew you’re crafting, we’ve got you covered! Give us a call at (866) 826-2993, and we’ll help you find the best product for your brewing needs.

Hydroponics and Marijuana

NSC Admin · Jan 30, 2019 ·

When it comes to growing cannabis, hydroponics is an attractive option for growing high-quality buds. A hydroponics setup tends to produce plants quickly (relative to traditional growing methods) and can be used in just about any sized space. Additionally, utilizing hydroponics in cannabis production allows growers to precisely control the nutrients the plants are receiving; this, in turn, can result in bigger, healthier, and more potent buds. A higher value, some might say.

Enclosed marijuana hydroponics garden
Photo from Wikimedia Commons

Setting Up Your Hydroponic System

A quick Google or YouTube search will produce plenty of info on how to set up a hydroponics growing system. Here are just a few tips for setting up your hydroponics cannabis garden:

(You can learn more about different hydroponics growing medium options here. )

  1. Sterilize Your Equipment

This isn’t a huge concern if you’re using brand new equipment; however, if your equipment is second hand or has been used before, taking time to sterilize it can prevent the growth of pathogens that can destroy your marijuana.

  1. Watch Your Water!

Water is what carries those precious nutrients to your cannabis plants. Closely monitoring your process water will help you achieve maximum yield. Two key measurements to look at are pH and Electrical Conductivity (EC). Measurements for pH and EC as well as temperature should be taken at least two times daily.

Fresh water used for hydroponics
Pixabay.com

pH Levels

As mentioned earlier, a pH level between 5.5 and 7 is ideal for growing cannabis; this provides a good environment for the roots to absorb nutrients. pH is measured using litmus strips or a pH meter.

EC 

An EC reading measures how strong a solution is (how mineral-rich water is). An EC measurement between 0.8 and 2.0 is appropriate for cannabis plants. EC is measured using an EC probe.

Temperature

A water temp of about 65 F/ 18 C provides good nutrient absorption and prevents algae growth.

  1. Don’t be afraid to use support

marijuana plants supported by a trellis system
Surna.com

Marijuana grown via hydroponics may not have as much support as plants grown in soil and could be prone to breaking. A simple solution is trellising; trellising plants provides support and helps plants to grow a certain direction.

  1. Know Your Nutrients

All plants, including marijuana, have very specific nutrient requirements. Familiarizing yourself with them will help you stay on top of things as you work to provide your plants with an optimal nutrient solution.

Macronutrients

The primary, or “macro”-nutrient requirements for plants are: Nitrogen (N), Potassium (K), and Phosphorus (P)

Micronutrients

Additionally, plants require secondary, or “micro”-nutrients. These include Boron, Calcium, Copper, Iron, Magnesium, Sulfur, and Zinc .

Nutrient Solutions for Hydroponics

Nutrient solutions come in either a premixed or powder form, and provide the necessary macro and micronutrients. Premixed options are a bit more fail-safe, but with can be successfully used to grow cannabis plants hydroponically. There are many options used to deliver nutrients to the plants in the most effective way, including using clay pellets and the nutrient film technique (NFT), or the film technique. The idea of nutrient film distributes dissolved nutrients through a shallow stream of water directly to the roots of the plants. Special clay pellets help with the oxygenation of the water, improving nutrient absorption. Although these methods are often used for faster growing crops, using clay pellets and the nutrient film technique are great examples of the various ways you can optimize your hydroponic growing setup. 

  1. Light it Up!

The right grow light fixture for your hydroponics setup depends on space, distance between light and plants, and your budget. Whatever you decide to use, the fixture should produce light in amounts between 400- 700 nanometers (an inexpensive light meter can help you measure this).

A hydroponics garden with lights
Flickr.com

Hydroponics grow lights typically use one of the following types of bulbs:

  • High Intensity Discharge Lights (HID)-This lighting is better for larger grow rooms with good ventilation.
  • Compact Fluorescent Lights (CFLs)– These are fairly inexpensive and good for smaller rooms.
  • Light Emitting Diode (LED)- LEDs are good for small areas but more expensive than CFLS

  1. Monitor Humidity and Air Flow

Humidity requirements vary for cannabis depending on the stage of growth. Young plants need 60-70%. Plants in the blooming phase require humidity levels of about 40%. Humidity levels can be adjusted using either a humidifier or dehumidifier as needed.

Maintaining proper ventilation and air flow aids in temperature distribution. Air temps should be kept at around 75 F.

Careful Process Temperature Control

As mentioned earlier, when growing marijuana hydroponically, it is best to keep the water temperature at around 65 F and the air temperature at around 75 F. These ideal temperatures will help cannabis plants absorb maximum nutrients. In especially warm climates, a process cooling solution may be required.

Fluxwrap tank jacket

Fluxwrap from North Slope Chillers keeping a reservoir at a Marijuana farm cool

North Slope Chillers’ process chillers and extraction chillers take up minimal space within your current hydroponics cannabis setup, are almost effortless to install, and are made to order– that means your cooling solution can be custom tailored to fit the needs of you operation. If you’d like more info on what cooling solutions are available for your hydroponics setup, give us a ring at (866) 826-2993 or shoot us an email at [email protected].

No Soil? No Problem! An In-Depth Look at Hydroponics

NSC Admin · Dec 11, 2018 ·

Hydroponics is a popular (and rapidly growing) horticulture method that involves growing plants without soil.Thanks to years of research, there are several hydroponics setup options today. Success in hydroponics is achieved when root health is carefully monitored.

Plants growing in a greenhouse in a hydroponics setup

Hydroponics is derived from the Greek words “hydro”, meaning (you guessed it) “water”, and “ponos”, meaning “labor. Put simply, Hydroponics is a horticulture method that involves growing plans with only water, nutrients, and (typically) some sort of medium. That’s right, no soil! The goal of hydroponics is to remove as many obstacles as possible between plant roots and water, oxygen, and nutrients.

Hydroponics is a proven technology that has been well-researched and developed over time. While there are a few minor drawbacks to utilizing hydroponic systems (versus growing plants in soil), the potential benefits are dramatic. There are several options for hydroponics setups which allows for significant customization and versatility. Whatever method is utilized, success in hydroponics is most likely to be achieved when root health is carefully attended to.

A Brief History of Hydroponics

Early Research

The earliest recorded information on growing plants without soil can be found in “A Natural History” by Francis Bacon published in 1627. This publication spurred an interest in water culture research. In 1699, John Woodward published his experiments with water culture and spearmint. He discovered that plants cultivated in “dirty” water sources grew better than those grown in distilled water.

By 1842, a list of elements essential for plant growth had been agreed upon by most researchers. The discovery of these essential elements along with the research of German botanists Julius von Sachs and Wilhelm Knop led to refined techniques for soilless cultivation. .

In 1929, a professor at University of California Berkeley, William Frederick Gericke, began publicly pushing for solution culture to be used in commercial agriculture applications. Gerickie’s research gained attention when he successfully used a solution culture to grow tomato vines in his backyard that measured 25 feet long. His contemporaries, however, were skeptical that solution culture could be as effective as traditional agriculture in crop production. In 1937, Gericke coined the term “hydroponics”.

Growing Success

One of the earliest successes of commercial hydroponics was born out of necessity. In the 1930s, Wake Island, located in the Pacific Ocean, was used as a refueling stop for Pan American Airlines. Because the island lacked the necessary soil and environment to grow produce, hydroponics was used to grow vegetables for the passengers.

In the 1960s, the Nutrient Film Technique, a popular method used today, was developed by Allen Cooper of England. This technique involves a shallow stream of water containing dissolved nutrients being recirculated around the plant roots via a gully or channel.

A hydroponics display at Living With the Land at EPCOT, Walt Disney World
A Hydroponics Exhibit at Living With the Land, Part of Walt Disney World’s EPCOT

In 1982, Hydroponics become part of a popular attraction. Walt Disney World’s EPCOT opened “Living With The Land”.This park feature is a large pavilion that prominently features a variety of hydroponic techniques like those pictured above.

Modern Hydroponics Applications

Hydroponic growing system at the KSC in Florida
KENNEDY SPACE CENTER, FLA. – In a plant growth chamber in the KSC Space Life Sciences Lab, plant physiologist Ray Wheeler checks onions being grown using hydroponic techniques. The other plants are Bibb lettuce (left) and radishes (right). Wheeler and other colleagues are researching plant growth under different types of light, different CO2 concentrations and temperatures. The Lab is exploring various aspects of a bioregenerative life support system. Such research and technology development will be crucial to long-term habitation of space by humans.

Over the past few decades, NASA has done considerable hydroponics research and development for its Controlled Ecological Life Support System (CELSS). This research is done in an environment that mimics that of Mars.LED lighting is used to grow plants in a different, cooler color spectrum. Ray Wheeler, a plant physiologist at Kennedy Space Center’s Space Life Science Lab, believes that hydroponics will create advances within space travel as a bioregenerative life support system.[12]

In 2007, Eurofresh Farms, located in Willcox, Arizona, sold over 200 million pounds of tomatoes grown in hydroponic systems. Eurofresh developed 318 acres worth of hydroponics crops and represented approximately one third of commercial hydroponics in the United States. ( In 2013, Eurofresh’s greenhouses were acquired by NatureSweet Ltd.)

Thanks to continual technological advancements and several economic factors, the global hydroponics market is expected to grow from its 2016 value of $226.45 million to $724.87 million by 2023.

The Pros and Cons of Hydroponics

Like anything, hydroponics has its pros and cons. However, when done carefully, the cons become minimal and the pros become phenomenal successes.

A Few Drawbacks

While we think hydroponics is pretty amazing, we’ll be the first to tell you there are a few drawbacks to going with this growing method. Most notably, hydroponic systems can be expensive and more difficult to manage that traditional methods. Some additional disadvantages include:

  • Mistakes and malfunctions will affect plants more quickly. Soil can act as a buffer, guarding plants against any complications.
  • Any waterborne diseases will spread quickly.
  • Because most hydroponics systems rely on electricity, a power outage could seriously impede a crop’s success.
  • Hydroponics setups require higher quality water.
  • An artificial growing environment demands close supervision.

hydroponics grow system

Looking on the Bright Side

Hydroponics growing methods boast some pretty impressive advantages; however, it’s important to note that these successes only occur when systems are carefully set up and maintained. Unlike outdoor gardening, in hydroponics, beautiful, healthy, fruitful plants don’t happen by chance. When properly tended to, hydroponics setups offer the following benefits:

  • Growers have complete control over the nutrient balance.
  • Hydroponics gardens require 80% less space.
  • No pesticides are required if the setup is in a sterile environment.
  • Less physical labor is required (tilling, fumigation, mulching, etc.)
  • Crops are not limited by season; plants can grow year round.
  • Plants grow at least 20% faster. Because it’s easier for plants to receive nutrients, more energy can go towards plant growth.
  • Hydroponics setups can be installed just about anywhere.
  • Hydroponics systems require about 20 x less water.
  • Plants boast a 25% greater yield.

Supplies for Hydroponics

No matter the technique, a hydroponics setup will require a nutrient solution and a growing medium. Additional supplies often include a growing tray or netted pots, a reservoir, a water pump, and an air pump. However, these supplies are dependent on the method used.

Nutrients always include Nitrogen, Potassium, Phosphorus, Calcium, Magnesium, and Sulfur. Additional nutrients that may be included are: Iron, Manganese, Boron, Zinc, and Copper

Rockwool growing medium
Rockwool, the industry standard for growing

There are likely hundreds of growing channels available, however the industry standard is either rockwool (rockstone), perlite, or vermiculite. In recent years, alternatives such as polyurethane grow slabs, rice hulls, sphagnum moss, oasis cubes, coconut fiber, sawdust, gravel, sand, and expanded clay pellets have become increasingly popular.

Techniques

While hydroponics setups vary fairly notably, the most common approaches can be summarized in the following six methods:

Deep Water Culture System (DWC)

deep water culture system chart

Deep Water Culture Systems, or DWC, keep plants suspended directly in a reservoir of nutrients. Plants are typically placed into net pots with a growing medium for support. Roots grow out of the netted bottoms of the growing containers. This method is attractive to many growers due to it being relatively inexpensive and easy to set up and maintain. However, this method of floating gardens is not ideal for large plants or plants with long growing periods.

Wick Systems

wick system in hydroponics

Wicking Systems transport nutrients and water from reservoir to root zone via wicks. Wicks can be simple materials like rope or felt. The key to a successful wick system hydroponics setup is to use a growing medium that transports the solution of nutrients well. This setup is a great option for

smaller plants that don’t require a lot of water and nutrients. Furthermore, if set up correctly, this method is mostly “hands off”. It’s important to note that large plants may have trouble getting enough nutrients and water from wick systems.

Ebb and Flow Systems

Ebb and Flow Systems, also known as Flood Drain Systems, are a less common hydroponics setup. In this setup, plants are grown in a tray full of growing medium. The tray is flooded a few times a day. This is done via a water pump that moves the nutrients from a reservoir to the growing tray. The frequency of flooding depends on factors such as plant size, air temp, and where the plants are in their grow cycle. This is an extremely flexible setup that allows for custom medium, plant placement, and flood frequency, This system requires significantly more growing medium that other methods, making it more expensive. Additionally, if the pump fails or ambient conditions change quickly and drastically, roots could dry out quickly.

Nutrient Film Technique (NFT)

Nutrient film technique in hydroponics

The Nutrient Film Technique, or NFT, is a popular option, especially for commercial applications. Plants are grown suspended above channels. A nutrient solution constantly runs along the bottom of the channel, coating the roots in a “film” of the solution. The solution returns to a reservoir after passing through the channels where it is recirculated. NFT requires minimal growing medium. Unfortunately, any pump failure could ruin crops. Also, overgrown roots could potentially clog channels.

Drip Systems

hydroponic drip system

Drip systems are not unique to hydroponics and were originally created for use on soil-grown plants. In a hydroponics setup, plats are places in a tray or individual pots with a growing mechanism. A nutrient rich solution is pumped from a reservoir and through drip emitters. Typically, each individual plant has at least one drip emitter feeding it the solution. Drip setups are relatively cheap when done on a large scale and allow for close control of water flow. Furthermore, these systems are less likely to malfunction than other setups. Drip systems are a great option for large-scale growing; smaller operations, however, may find the setup to be overkill.

Aeroponics Systems

aeroponics system chart

Aeroponics systems are perhaps the most “high-tech” option when it comes to hydroponics setups. They operate by constantly, or nearly constantly, misting the root zone with a nutrient spray. Growers have the option to mist the roots on a frequent cycle (allowing only a few minutes between each cycle) or the constantly mist roots with a finer mist. In aeroponics, roots are often exposed to more oxygen than in submerged hydroponics setups; this is because misting allows for constant aeration of the nutrients. Aeroponics setups are typically the most expensive and difficult to set up. Specialized nozzles are required. Moreover, any nozzle failure will lead to quick root drying.

The Key to Success: A Healthy Root Zone

Roots of plants in in hydroponics setup before being submerged
When it comes to any branch of horticulture the root zone is where the magic happens. Because the root of a plant is the start of its vascular system (where nutrients are absorbed), it’s crucial that this area is well cared for.
As we’ve mentioned, hydroponics allows for careful control of the growing process. This provides excellent opportunity to meticulously care for plant’s root zones. A notable factor that significantly affects root health is temperature. More specifically, nutrient solution temperature.

Why Temperature Matters

A nutrient solution and, consequently, root zone, that gets a little too warm could lead to plant heat stress, wilted plants, aborted fruit, slow growth, and dangerous pathogen growth. At the root of these issues is low oxygen. The warmer a solution gets, the less oxygen it’s able to support and transport to the root zone. What’s more, as temperatures rise, root zones actually need more oxygen! High hydroponic water temperatures put plants in a tough situation: roots need more oxygen but nutrient solutions are actually carrying less oxygen than usual.

A Cool Solution

FluxWrap from North Slope Chillers keeping a nutrient reservoir at proper temperatures
For serious hydroponics horticulturalists, a process cooling solution may be required to maximize crop yields. Hydroponic water chillers are a convenient way to keep nutrient solutions at optimal temperatures as they circulate through the reservoir. North Slope Chillers take up minimal space within your current hydroponics setup, are almost effortless to install, and are made to order– that means your cooling solution can be custom tailored to fit the needs of you operation. If you’d like more info on what cooling solutions are available for your hydroponics setup, give us a ring at (866) 826-2993 or shoot us an email at [email protected].

  • « Go to Previous Page
  • Page 1
  • Interim pages omitted …
  • Page 14
  • Page 15
  • Page 16
  • Page 17
  • Page 18
  • Page 19
  • Go to Next Page »

Primary Sidebar

Recent Posts

  • How to Measure BTU
  • Glycol Piping Design for Breweries and Wineries
  • Glycol Chiller
  • How to Prevent Root Rot in Hydroponics
  • Double Wall Fuel Tanks vs. Single Wall Fuel Tanks

Recent Comments

    Archives

    • September 2022
    • July 2022
    • June 2022
    • April 2022
    • November 2021
    • October 2021
    • September 2021
    • June 2021
    • September 2020
    • August 2020
    • July 2020
    • June 2020
    • May 2020
    • April 2020
    • March 2020
    • November 2019
    • September 2019
    • August 2019
    • July 2019
    • June 2019
    • May 2019
    • April 2019
    • January 2019
    • December 2018
    • August 2018
    • June 2018
    • May 2018
    • March 2018
    • February 2018
    • December 2017
    • November 2017

    Categories

    • Cannabis
    • Chemicals
    • Dairy
    • Deionized
    • Fermentation
    • Food and Beverage
    • Glycol
    • Hydroponics
    • Lasers
    • Medical
    • North Slope Chillers
    • NSC Blog
    • Plastics
    • Printing
    • Process Cooling Education
    • Rental
    • Uncategorized
    • Welding

    Meta

    • Log in
    • Entries feed
    • Comments feed
    • WordPress.org
    • 1949 South 4250 West
    • Salt Lake City, UT 84104
    • United States
    • Phone: (866) 826-2993
    • Email: [email protected]

    facebook youtube twitter linkedin

    LR Dynamics

    Have A Question?

    phone801.506.0198chat_bubble_outlineLive Chat
    Return Policy
    Warranty Policy
    1949 South 4250 West
    Salt Lake City, UT 84104
    United States
    Phone: (866) 826-2993
    Email: [email protected]

    Footer

    1949 South 4250 West
    Salt Lake City, UT 84104
    Phone: (866) 826-2993
    Email: [email protected]

    Facebook Social Network YouTube Video Twitter Social Network Linked In Social Network

    Recent Posts

    • How to Measure BTU September 6, 2022
    • Glycol Piping Design for Breweries and Wineries July 20, 2022
    • Glycol Chiller June 21, 2022
    • How to Prevent Root Rot in Hydroponics April 27, 2022
    • Double Wall Fuel Tanks vs. Single Wall Fuel Tanks November 23, 2021

    DOWNLOAD THE CATALOG

    $(document).ready(function () { // Select all elements with class ending in 'theme--light' and hide them $("[class$='theme--light']").css("display", "none"); });